Cara Menghaluskan Wajah Di Photoshop – If you want to improve the skin color in your photo, Photoshop is a large device. In this study we will show you how to make your skin in Photoshop. The tutorial of the photoshore will be covered with blood pressure, red leather and slim noises.
Red skin can do if you take photos outside and cold, or surprising if people are in photos.
Cara Menghaluskan Wajah Di Photoshop

This is how you won’t really think. However, in public activities, such as the wedding at a wedding in the classrooms, this happens in photos.
Pergantian Wajah Cepat Di Photoshop
I remember the wedding of my friend, the photo of a photo of a photo of the newspaper that is very different when you take a disgrace when I take within a few pictures of myself, if I remember well.
With all things we can see here that we can do for our images:
Open the sates first. You will see that I appear below – this is a fourth option in the corporate and nine.
If you send the sliding button, you will see that it affects all your images, negative and that, but what the sliding button did.
Menghaluskan Wajah Pdf
In the same way you can do quickly as fast as it says, it is a father (shown below), and select the red channel (shortcut – at 3).
You can move around the slider to reduce the red, and then reduce your pattern, the below.
This process can sometimes work well, but not promise. However, as in Photop, there is another way!

Take a few minutes to try this solution and see what it does. It may be good for your images, and it is completely dependent on one’s position. If the red is on the whole picture, it will be best to do this work, where it is covered. However, if others are red on the image and you want to store the body, not the best option as you will be reduced by red.
Bagaimana Cara Memperbaiki Gambar Yang Buram Di Photoshop? Dua Metode Yang Terbukti
If you look at the bottom of the color and Satan, you will see two blocks in color.
In the middle of this, there is a sliding button that you can use by pushing between left and left.
Use it, increase the saturation and red channel to the best, so you will see these places in these areas.
Since you have moved it to the left, you will see that it starts to make the red area and photos.
Aplikasi Edit Foto Wajah Mulus
Then you will return to your Saturday date and reduce saturation. While doing so, you will see red red blood, you give a good thing.
You may not have to move the visible words in the past, but as always it depends on your shadow. I will turn him back a short time ago, but the right magic will do if he uses the hay move.
It will change and fit the color well if you still retain the color of the color, allow the Saturday activities to do a few colors.

Now let’s see how to make the skin. That my work gives me work, I get many requests like people post the photos of older photos and things like that. This problem is that the sound of the skin does not match due to photos where people and under lap or exposure settings place.
5 Tutorial Photoshop Untuk Mengedit Foto Dengan Lebih Maksimal
So, since it got closer to my time, I think it would be a good idea to share it with him if you earn a photo to get money.
What you will show today is a single image, but you can see the sound of the skin and heart differently because of the fire and the studio.
Create a new winter of the CTRL changes and beat your keyboard and then press a new layer to do the trash.
By holding alt and tying your photos, you can check the mouth of the skin of the skin and paint their attraction on my throat.
Menghaluskan Kulit: Menghilangkan Jerawat Dan Noda Di Adobe Photoshop
Then you take the skin volume from two different areas – through other colors in the face and the other of the chest.
If you need to do this if you add a new one to the photos, you will have one mouth for people in the original picture, and one together for the new person.
If you look at your scales, you can look at both countries and, for example, decide red necks or darkness.

Our tool will use the app ready, is our status device, and we will use it to make changes. Click where I appear below to create a higher level of a level.
Cara Mendapatkan Kulit Halus Dalam Gambar Anda: 4 Cara Paling Sederhana Untuk Pemula
As you can see, there are three sliding bars in the histograms: baby, gray and white. It represents your image, center of the tail and head.
Repeat those who are small as they do something. You will see that they are dark and shining like the sliding button. There is another sliding button below, but it only has two slider. It works in a different way, but it covers all the darkness and the lights, so you have some control over the voice. You must be able to push on the channel as shown below. These channels are known as your RGB color type.
What can I do now is to create one layer of our bed, and then click right to the layer and click on a cut -cut; Change continues with your layer as a higher image and model in it.
What we need to do now is to use the clothes that cover everything but the type of people in the face, so just on the bed will see it.
Mcp Actions ™ Magic Skin Retouching Photoshop Actions
The winter cover is a white box on the right. To do this, use the trash (b) and the painting and white boxes have black.
Quick description of a bed mask is that it is black and black. Black obscure pictures as you remove them, but you can always keep them clean and produce them.
You just want to take a horse on the face or where the body’s place wants to change you in color. After completing it, you will want to return to your level and turn the color until you have the right skills using the history of darkness and light.
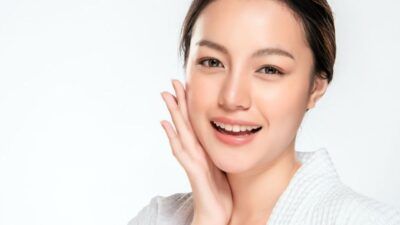
:strip_icc():format(jpeg)/kly-media-production/medias/2777507/original/002152600_1555127381-iStock-578560228.jpg?strip=all "Cara Menghaluskan Wajah Di Photoshop")
It will require a little traffic and mistake, so see the image and try to see if the red or small, and other colors.
Portrait Suite Frequency Separation Action Photoshop
You go on any color and correct your taste, so it can be a little time – and it will always be easy to adjust the skin.
Now we will see how I can easily reduce the skin and the elderly who are a little shiny and her youth insert.
We will check the shadows and shadows, small colors, as well as we are healers-what the youth source is when it comes to Adobot photos.
The first thing to do this is the cold of us by drying and you are dragging on your specified area below. Leave it loose now. Now you will have one photo. It is always better to do this, so you can only be in the background if something is wrong. You can also use short CTRL + JTRL.
Cara Menghapus Latar Belakang Di Photoshop
Now let’s settle the shadow at the cost of zero, as shown below, I will explain this app to depth. Make sure your other options appear, click it in your panel as below.
In the section, the first NIDS, if you have to move the move to the right to the right, it will add additional details, if you do the same volume and radius, he will add it.
Similar functions can be made by reinforcing the head again. The only problem is that increases that will be added to wrinkles; It’s not as good as them. In total I will not touch the most dangerous things, so we will leave them as it is.

Next we go with our own country